How a dip pen nib makes a line
A dip pen has a removable metal nib fitted into a holder. Near the tip, a slit leads to a small opening called the breather hole. Ink held on the nib travels toward the tip as it touches the paper. Unlike a fountain pen, a dip pen has no large internal ink supply, so you pause to dip it again. That pause can be useful: it encourages you to look at the drawing and decide what kind of mark it needs next.
The nib’s shape affects the line, but it does not act alone. Pressure, drawing direction, ink, paper texture and drawing speed all change the result. Two artists using the same nib may make noticeably different marks. Treat descriptions such as “fine” or “flexible” as starting points, then test each nib with your own hand.
Pointed, broad-edge and fine-detail nibs
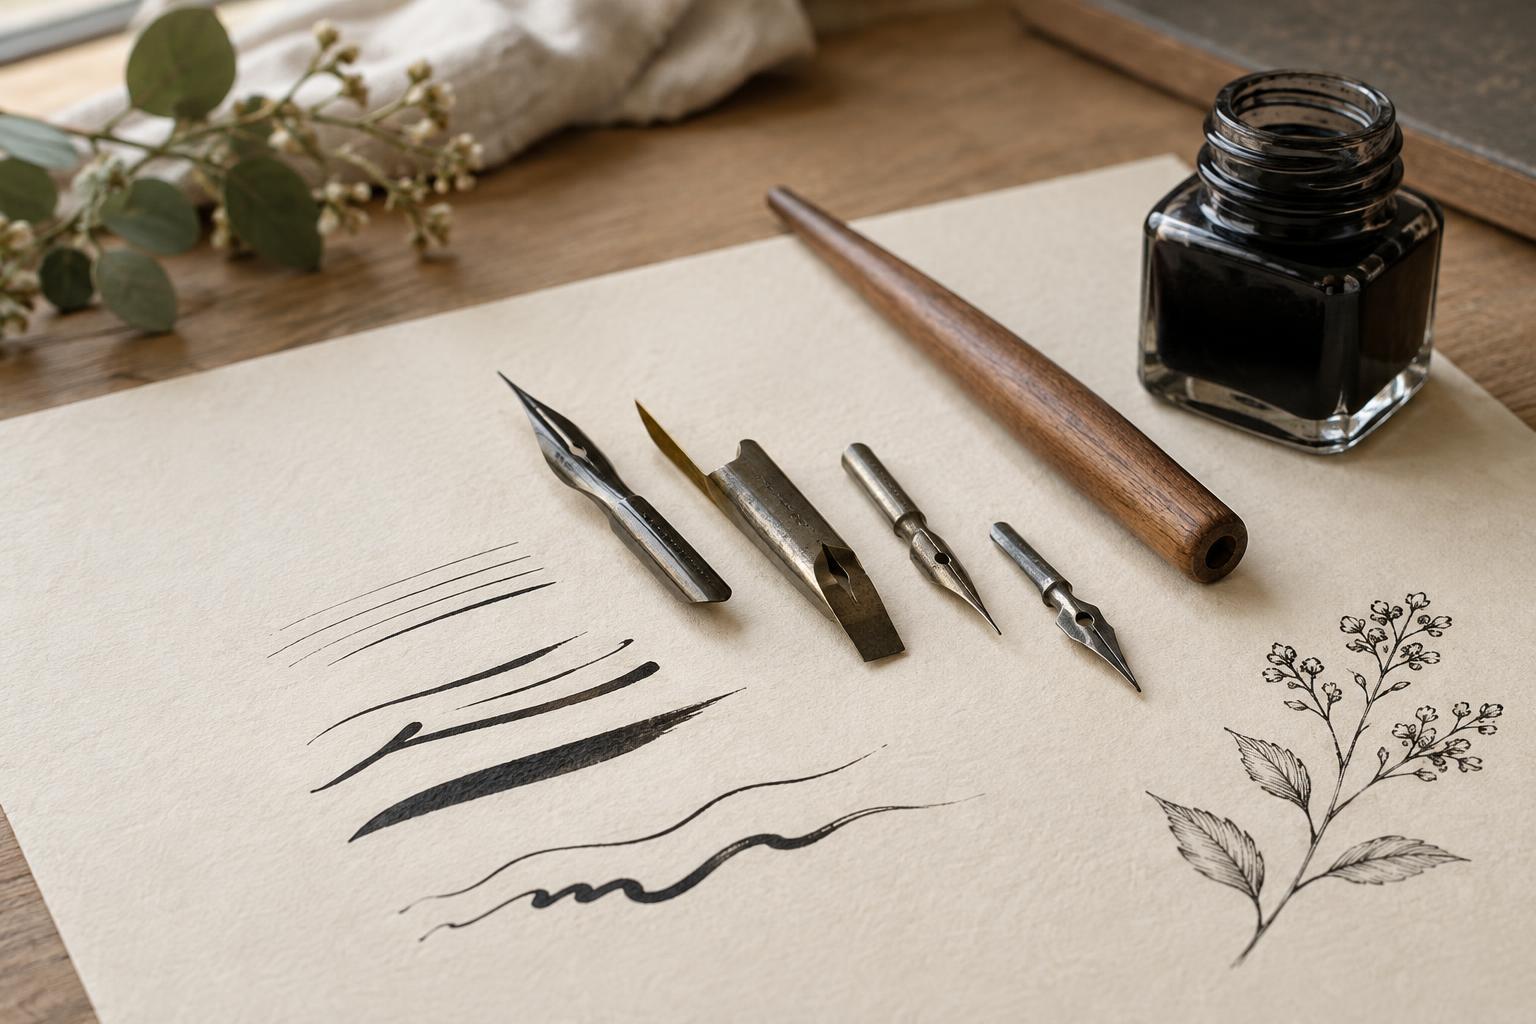
A pointed nib is a versatile first choice for expressive drawing. Used with a light touch, its tip can make a narrow line. On many pointed nibs, gentle pressure separates the two halves of the tip, called tines, and widens the stroke. This makes pointed nibs useful for contours, hatching and marks that shift between delicate and bold. Not every pointed nib flexes to the same degree, however; some are fairly firm.
A broad-edge nib has a wider, flatter writing edge. It makes marks whose width changes mainly with the angle at which you hold and move that edge, rather than with added pressure. It can be enjoyable for blocky shapes, patterned marks or drawings that combine lettering and image. Very small, fine-detail nibs can make intricate textures, but they may catch on rough paper and can be less forgiving while you learn. For a first purchase, a moderately fine pointed nib and a compatible holder are usually enough to explore.
What flex feels like—and when to use it
Flex describes how readily a pointed nib’s tines spread under pressure. A flexible nib can create a dramatic change in line width, but it also asks for control. Press too hard and the tines may spread beyond their intended range, release too much ink or become damaged. A firmer nib gives a steadier line and may feel easier when you are learning to draw slowly and deliberately.
Try varying pressure on a smooth sheet: make a light line, increase pressure gradually for a wider stroke, then ease off. Pull the nib in a direction that lets its tip glide over the paper. Pushing a sharp point hard into the surface is more likely to snag. Rotate the sheet when a stroke feels awkward, and remember that a bold line need not come from one forceful pass. Several controlled strokes may serve the drawing better.
Ink, paper and a simple first test
Ink flow can make a nib seem wetter or drier than you expected. An ink sold for dip pens is a sensible place to start; check its label, especially if you also own a fountain pen, because inks suited to one tool are not automatically suited to the other. Dip only far enough to load the nib without coating the holder, and touch excess ink to the bottle’s rim or a scrap sheet. Keep the bottle stable and away from the area where your drawing hand moves.
Use a reasonably smooth paper for your first trials. A coarse surface may catch a fine point, while very absorbent paper can make lines spread. On a test page, draw slow and quick lines, curves, crosshatching and a few strokes with changing pressure. Note where the nib glides, where it snags and how long it draws before the next dip. This small exercise tells you more about the combination of nib, ink and paper than the nib’s label alone.
Keep the tool simple and clean
New nibs can carry a protective coating that interferes with ink flow. Follow any preparation instructions supplied with the nib, then test it before assuming it is faulty. After a drawing session, clean off the ink according to its label and dry the nib thoroughly. Dried ink can clog the slit, and moisture left on metal can encourage corrosion. Store loose nibs where their tips will not be bent or pressed against other tools.
Begin with one nib rather than a large assortment. Learn how it behaves in short sketches, then choose your next nib to solve a specific problem: a firmer point for steadier hatching, a more flexible point for varied contours or a broad edge for angular marks. The best beginner nib is not necessarily the one capable of the thinnest or widest line. It is the one that helps you make marks you can understand and repeat.